What Makes Charge Controller So Important In A Home Solar System

Have you ever wondered why solar products are gaining popularity by the day? Apart from its environmental benefits, there is another big advantage that draws people towards this technology. It is the money you can save in long-term use.

‘Long-term’ is a huge word for solar products; you can say that it is the basis of their survival. In order to recover the invested money, solar power products should be good enough for long-term use. So quality of a home solar power system should be of very high standards, otherwise it just won’t survive in the market.

Whenever you think of a solar based PV system, the first thing that will come to your mind will be about the batteries. You will be concerned about the life of the batteries. Solar batteries are quite costly and so it is very important that you have a solar charge controller installed in your solar power system.

The life of the battery depends heavily on the solar charge controller. The function of a solar charge controller is to regulate the power going from the panels to the batteries. For example on a sunny day the panels may generate more power than the batteries could actually store, which might lead to overcharging and harm the batteries.

In this case, the solar charge controller controls the power generated and only sends the permissible amount of power to the battery. The technology used in the solar charge controller is called PWM or Pulse Width Modulation.

This technology ensures constant voltage battery charging. It is done by switching solar system controller’s power devices. With PWM we can prevent overcharging by controlling the power generated.

PWM is an essential technology for prolonging battery life. The problem with solar batteries is that, they release lots of gases during charging and discharging cycles, which in turn reduces the battery life. Solar charge controllers without Pulse Width Modulation system will not be able to deal with the gassing problem.

The working of PWM is based on algorithms, which works by gradually reducing the charging current to avoid overheating and gas release, ensuring normal charging of the battery at the same time. This technology provides you a highly efficient, quick recharging and durable battery at full capacity.

Some of the latest PWM chargers also come with additional features like recovery of lost battery charging capacity, increased charge acceptance etc. There are a variety of PWM based solar charge controllers available in the market and choosing the right one is always a tough task.

Moreover they will be coming with a high price tag, so it would be better to do some research about the manufacturer and find out whether they provide high quality ones or not. You can ask some of your friends for referrals.

Don’t go for cheap and low quality ones which will harm your system. Always look for warranty and servicing information. Make sure that the manufacturer has got good service coverage in your area. If chosen wisely, it is guaranteed that this technology will help to increase the efficiency and durability of your battery bank.

The Importance Of A Multimeter When Making DIY Solar Panels


If you are planning to build your own DIY solar panels to supplement your home energy consumption, one of the basic devices you’ll need is a multimeter. A multimeter is an efficient tool to detect any problems with any electrical devices and it is also used to test the resistance or continuity of an electric circuit. Though this equipment was used, only by engineers or electronic technicians in the past, but now a days it is available in every handyman stores.

It is also affordable and has found a place in everybody’s toolbox. Digital multimeters and analogue multimeters are two different types of multimeters which are available in the market. In a digital multimeter the test readings are displayed in numbers whereas in analogue multimeters display the readings by a value with the help of a needle on a scale.

An electric light may look good but may not function, and then a multimeter is the right device to be used to detect the problem. An important thing that you to be aware of is that it is risky to do any electrical testing while the appliance is connected to any source of power.

Hence the first thing you have to do when working with a multimeter is to see that no live voltage is connected to it. When you are conducting a continuity test after disconnecting the power supply you have to arrange the multimeter to measure resistance. When you are working with solar cells, remember, the cells do generate a charge and you may get a jolt out of it. So be careful!

Using The Multimeter

First you have to set the dial of the multimeter to ohms which is a unit of resistance. You can see two test probes, one which is red is positive and the other a black one is negative. The meter reading will be a zero if you touch the two test probes together.

A zero resistance or a zero reading shows that there is a perfect continuity or there is a closed circuit that conducts current. With this knowledge you can test the continuity in homemade Photovoltaic (PV) panel.

By touching a test probe on the PV cells main string wire and bringing the other test probe into contact with the other end, you can complete the test for continuity test.

A current (amp) reading shows that the solar cells connection is good, any other reading indicates the discontinuity or that the wiring or a solar cell may be faulty and needs to be replaced.

If the circuit is open the multimeter will show discontinuity. It is worth reminding that the power is to be disconnected before conducting any kind of electrical testing. A digital multimeter which is also known as a multitester can be used to test a switch.

You can touch a test probe on each side or pole of the switch. You have to move the switch from off position to on position. If the multimeter reading changes from zero to infinity it indicates that the switch is in a working condition. Because when the switch is in the on position it is not having continuity since the current cannot flow through.

But if the mutimeter reading does not change then your switch has got some problem and you have to fix it. Likewise a multimeter can be used to test a motor also. This can be done by placing a test probe on both the poles. In this test also a zero reading proves the continuity and shows the motor is functioning.

By studying the instructions on the digital multimeter you can do more detailed test too. Multimeters are used to test alternating currents and direct current also along with many other tests.

You can use a multimeter to test a battery by using it on the DC range. Thereby you can find whether the battery is charged. It is worth spending some time studying the basic tests performed by the multimeter so that you can easily figure out the cause of an electric problem that may arise in your daily life. Needless to say whatever electrical tests you perform the priority is to be given to your own safety.

5 Step To Building A Home Solar Battery Bank On A Budget


One thing is for certain, energy is only going to continue to become more expensive as the years go by. People are always looking at different ways to reduce their home monthly bills, and one way is to generate energy from solar panels.

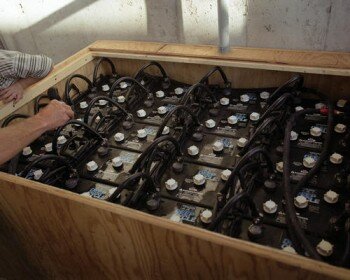
Renewable energy projects at home can be expensive. The time recouping these costs can take quite a while but the end result is cheap energy. A major expense in the process of solar energy panel installation is the storage battery bank.

The battery bank will be used when the sun is not shining. It is possible to find cheap deep cycle battery storage and if you follow the 5 points outlined below, you will be able to keep the costs of purchasing the batteries relatively low.

1. Free or cheap.

The types of battery used in the storage bank are lead-acid deep cycle batteries. These batteries are designed to recharge and discharge quite frequently. These types of batteries are very expensive when bought brand new. There is a way that you may be able to pick up cheap ones, or even free ones.

You can find these types of batteries used on electric golf carts, wheelchairs, and even boats. Golf clubs or boat yards will often times have discarded batteries and in many cases be glad to get the batteries off of their hands.

2. Testing.

The first thing you will have to do once you have procured your batteries is to test them. There are certain issues or faults that will make them useless. Testing them is quite simple. All you have to do is connect them to a charger and charge them. As soon as you have charged them, you will need to take a measurement of the voltage with a multi-meter.

The meter should have a reading near 12 volts. If your reading is a lot lower than 12 volts, it could be an indication that there is a bad cell or bad cells. Mark it and put it to the side to test further later. You will want to focus your priorities on the batteries that reach the 12 volt reading.

3. Cleaning the plates.

The lead plates that are located inside the cells are more than likely to be contaminated. This is a result of a process called sulfation.

Sulfation is when the lead plates have a layer of lead sulfate crystals on them even when the unit is fully charged. This process of sulfation is what prevents the batteries from holding a charge. You will then need to remove the contamination by using a different charger.

This special charger is sends a high current pulse out to the battery that will break down the crystals, thus reducing the contamination. I know there is concern about the cost of the charger, but the money you will save on new batteries will make up for the initial investment for the charger and locating cheap or free batteries.

4. Renewing the electrolyte.

Next you will have to renew the electrolyte inside of the cells. The electrolyte is the fluid that is located in the case between the lead plates.

Deionzed water should be used for this step. This water should be refilled to cover the lead plates located inside the battery cell. An electrolyte conditioner may also be added to the cells. This conditioner can be found online or at a local auto parts store.

5. Recharging the battery.

The lasts step is to recharge the recently restored battery and then test the voltage again. After you have done the reconditioning process, the second hand should be able to hold the electric charge from the Photovoltaic (PV) panels.

The 5 steps above may seem tedious, nonetheless, doing so will save you a lot of money when you are setting up a home battery storage bank. This is how you will be able to find a cheap or free battery cell for your own personal home solar power plant.

Following these steps you will be able to make renewable energy a much more viable option. It will also make the process more of a cost effective idea. By finding these deep cycle batteries cheap, you will reduce the initial investment and shorten the time it takes for you to notice the savings that using a renewable, green energy such as solar power.