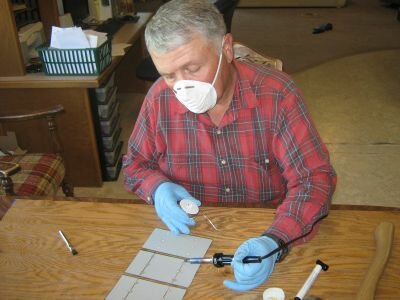
Tabbing Solar Cells – The Right Way To Solder PV Cells Together


This is a general introduction to the steps needed to tab and solder solar cells together. Also a brief definition as well as the distinct difference between un-tabbed and tabbed solar cells.

You may know that currently there are both tabbed and un-tabbed solar cells on the market. The tabbed solar cells are more expensive, however if you intend to build more than one solar panel, they will save you time, broken solar cells and future frustration.

Solar cells are quite fragile as a general rule, the more you handle or mishandle them, the greater the chances are of breaking them. The un-tabbed solar cells must be soldered, doing this to any solar cell requires great skill and care.

The soldering iron should be of a good quality with a 65 to 75 Watt adjustable unit with the temperature set at about 700F. You must find the temperature that is perfect for your specific solder.

If you run the soldering iron too cold, the solder will not run properly, too hot and you risk damaging the solar cells. Doing this to un-tabbed solar cells effectively means soldering right across a solar cell, having to solder a new metal tab strip to the front of each solar cell before you can even start to connect your solar cells together.

You can solder the strip directly to the solar cell with flux or, pre-solder or “tin” each strip and then solder it to the solar cell. The goal is to get a solid solder connection to the solar cell or it will not transfer current.

Solar tabbing ribbon typically consists of 10 -15 micrometers of solder alloy, commonly SN60 (60% tin and 40% lead) coated on copper strip, note this contains lead.

Apply flux to the big shiny strips (the bus bars) on the front “sunny-face” of the solar cell. Lay the tabbing strip along the fluxed bus bar and with a flat tipped soldering iron, run slowly down the strip. If done with skill and extreme care, the tabbing strip will bond to the bus bar.

I highly suggest you practice on a broken solar cell with some spare strip to get a feel for the soldering. There are usually two of these on each solar cell. This makes twice the work with the chance that you will break some of the solar cells.

Tabbed solar cells come with the metal connecting strips already attached to the front face side of the solar cells, this strip is long enough to lay across the next following solar cell. The tab strips will connect the front of one solar cell to the contact points on the back of the next.

In general, the solar cells are negative on the front and positive on the back which allow the electricity current to flow between the solar cells in your solar panel. Tabbed solar cells are in my opinion the safe option if you want efficiently installed solar cells that do the job you need them to do.

DIY Home Solar Panel – What You Need To Know In A Nutshell


Building your own solar panels can save a lot of money for you. I do not know if you are a person who likes to do things by yourself and whether you have done your own projects before, but why not give it a try?

I have listed out the things that you will need to build solar panels on your own and my suggestion is that start with one panel. You can then decide on how many number of PV panels you actually require and just repeat the process.

Before you begin, you need to have Photovoltaic or solar cells. There are many manufacturers of solar cells in the market and you can buy any of them. You can even buy them on eBay and have it delivered to your doorstep.

But before that, you will have to determine as to how many number of PV cells you will need prior to placing an order. It is recommended that you go only for the A-grade solar cells. It is better to build solar panels with better grades of cells because you’ll get a better energy output.

The next item that you need is the frame to mount the solar cells. I suggest that you use 1/8th inch thick aluminum angles to make the frame. Of course, you can use 1/16th inch angles, but if you want it to last for many years, it is better to use thicker grade angles. I have built my solar frame with 1/8th inch thick angles and it works just fine.

Tempered glasses are also required for making solar panels. My suggestion is go with 1/4th inch thick glasses for your panels as it provides strength thus the panels that you build will last longer. You can easily buy tempered glasses online from any of the many listed glass suppliers.

In order to mount the solar cells to the substrate, you will need encapsulating epoxy. It can be bought online in varied quantities or for each panel. This is normally what I do.

Make sure you layout all the solar cells after ensuring that connections have been properly soldered and testing with a 300 watt light bulb to determine the DC voltage that it is generating. It is important to test each stringer of cells to avoid problems later.

Allow a setting time of 4 days for the finished encapsulated panel. If you need more instruction, check out all the DIY home solar guide in the market for step-by-step instructions on making solar panels.

I would, recommend that you buy a step-by-step guide before you attempt to build solar panels on your own. The book will tell you all that you need to do from start to finish.

Are excited about started your own homemade solar panel project? My first experience was pretty interesting. I was a bit hesitant in the beginning and did break some solar cells. However, after a few trial and errors, I did managed to solder a string of solar cells. Keep repeating the process and before you know it, you have enough PV cells soldered to make your solar panel.

Weller WLC100 Soldering Station Review – Soldering Iron For DIY Enthusiasts


If you are planning to build your own home solar panel via Do It Yourself (DIY) approach, one of the tools you need to get is a soldering iron. You will need it to solder pieces of Photovoltaic (PV) cells together to make up the solar panel.

The soldering station that I use is the Weller WLC100 which I bought from Amazon.com a few years ago and it cost me around $30. Now, well, the price has went up beyond $40. Nonetheless, it is still much less than the price of other Weller soldering iron stations.

Actually, I see no reason why anyone should buy the other models, the reason being when the element in the other models does not function, the cost of replacement of the element is more than the cost of Weller WLC100 soldering station!

The best part is that the WLC100 does not have an element; only the tip needs to be replaced. The tip can be got from any Radio Shack for a dollar or two at the most. Believe me when I tell you that I have not had a chance to replace the tip on my soldering station after all these years of use.

I always maintain it nice and tinned. This model heats up really fast and has not let me down every time I need to solder solar cells or electrical wires together. It is just as good as the “blue” ones that cost almost three or four times as much from the same company.

It pays to buy the Weller WLC100 now, before any further price rise. It is worth it because it will last a lifetime. For the same price one will be able to purchase a ‘Professional’ series Weller iron with constant tip temperature or a lesser known brand that is temperature controlled and nice and easy to work with.

Weller durability and quality can be vouched for any of their product. However, if I were to state some disadvantages, the price is too high that one pays for a simple soldering iron that has no temperature control. The temperature varies widely when the power knob is turned.

There is no feedback system for it to be controlled automatically and gradually. For the quality of solder to be good the tip of the iron must maintain a temperature that is not too high or low. At extreme temperatures the solder will melt and the quality of the connection will not be good.

Cold solder joints that look fine on the outside give way fast because of the low temperature of the tip of the soldering iron. Troubleshooting is difficult in such cases. If the iron gets too hot, the copper traces may get burnt and they may even come off from the solar cell tabs.

The sensitive PV cell receptors get overheated and flux will surely get burnt out before the job is completed. Thus a hot iron also gives ‘cold solder’ joints. It happens because the flux is burnt off and does not clean the surface completely to allow the solder to stick to it permanently. Thus it is very important to use a soldering iron with a tip that has a feedback temperature control.

The WLC100 model looks like a soldering iron with temperature control, but alas, it has none. One cannot set or hold the temperature. It is just like any other soldering iron that one can purchase from Radio Shack at one-fifth the price.

If you are thinking of getting a soldering iron to build your own home solar panel, click on the button on the right to order the Weller WLC100 soldering station from Amazon.com and have it shipped to your doorstep right now!