If you are new to building your own solar panel, this is the right article for your enlightenment. As you know, going green is really worthy, but investing on Photovoltaic (PV) panels may be very expensive. The cost of photovoltaic panels is still high above $2.00 per watt which seems steadily decreasing.
Against this reality, people still need a cheaper way or an alternative to build a solar panel. Go ahead with buying solar cells which are the main constituents of the PV panels to generate power.
There are silicon solar cells coming in multicrystalline and monocrystlline which are more powerful and pure. There are several other types of solar cells but in Do It Yourself programs (DIY), monocrystilline solar cells of the size 3” x 6” are most commonly used. These cells come with the power of 1.6 to 1.8 watts.
Around 36 of these cells are used to build a 60 watt solar panel by which a laptop can be operated. These cells are sold in the market in 108 pcs which is enough to assemble three solar panels to produce 180 watts of solar power. You would then have to buy the solar ribbons or Photovoltaic wires which are used to connect and interconnect the solar cells together in a range in order to build your own solar panel domestically.
The solar ribbons constitute of tabbing wires and bus wires which are sold in different width and length. Once all the materials are ready, you can go ahead with building your DIY solar panel with the 3 x 6 solar cells. Connection of these cells with PV wires is much easier.

Basically it is like connecting the negative terminals to the positive ones in a huge array of PV cells which will form one set each of positive and negative terminals. On facing the side of the solar cell two sides of the cell will appear. The blue side will be the negative (-) with two white bus wires. The positive side (+) will appear behind the PV cells with 6 squire white bus wires.
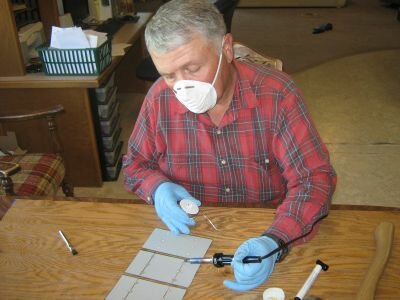
For connecting the cells, tabbing wires cut in 6” length are used. With a soldering iron the wires are connected to the negative and both the bus bars of the PV cell. Once this is done, with another piece of wire, both exposed positive sides are to be connected and soldered with the extended tab wire.
After doing so connection of the cells should continue in this way by soldering the new cells to positive bus bars. The process of soldering should go on, so that they should not fall apart.
In the next phase, four arrays of 9 PV cells are needed. Once the building of each array is finished, they need to be connected together with the bus wire at each end of the array. There will be three parts at which each array will break. Bus wires need to be soldered to those areas.
Before buying the solar products needed for your Do it yourself solar panel, at low cost, you can have details and necessary guidance. At some sites, you can track thousands of DIY customers’ history from this site.
From here you can have access to all products like 3 x 6 solar cells, PV frames, solar batteries and the accessories you need.