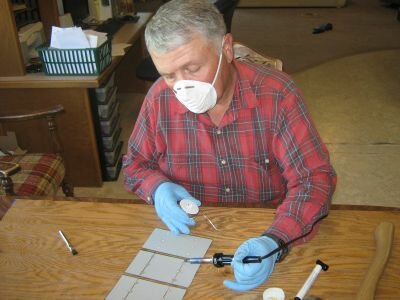
This is a general introduction to the steps needed to tab and solder solar cells together. Also a brief definition as well as the distinct difference between un-tabbed and tabbed solar cells.
You may know that currently there are both tabbed and un-tabbed solar cells on the market. The tabbed solar cells are more expensive, however if you intend to build more than one solar panel, they will save you time, broken solar cells and future frustration.
Solar cells are quite fragile as a general rule, the more you handle or mishandle them, the greater the chances are of breaking them. The un-tabbed solar cells must be soldered, doing this to any solar cell requires great skill and care.
The soldering iron should be of a good quality with a 65 to 75 Watt adjustable unit with the temperature set at about 700F. You must find the temperature that is perfect for your specific solder.
If you run the soldering iron too cold, the solder will not run properly, too hot and you risk damaging the solar cells. Doing this to un-tabbed solar cells effectively means soldering right across a solar cell, having to solder a new metal tab strip to the front of each solar cell before you can even start to connect your solar cells together.
You can solder the strip directly to the solar cell with flux or, pre-solder or “tin” each strip and then solder it to the solar cell. The goal is to get a solid solder connection to the solar cell or it will not transfer current.
Solar tabbing ribbon typically consists of 10 -15 micrometers of solder alloy, commonly SN60 (60% tin and 40% lead) coated on copper strip, note this contains lead.
Apply flux to the big shiny strips (the bus bars) on the front “sunny-face” of the solar cell. Lay the tabbing strip along the fluxed bus bar and with a flat tipped soldering iron, run slowly down the strip. If done with skill and extreme care, the tabbing strip will bond to the bus bar.
I highly suggest you practice on a broken solar cell with some spare strip to get a feel for the soldering. There are usually two of these on each solar cell. This makes twice the work with the chance that you will break some of the solar cells.
Tabbed solar cells come with the metal connecting strips already attached to the front face side of the solar cells, this strip is long enough to lay across the next following solar cell. The tab strips will connect the front of one solar cell to the contact points on the back of the next.
In general, the solar cells are negative on the front and positive on the back which allow the electricity current to flow between the solar cells in your solar panel. Tabbed solar cells are in my opinion the safe option if you want efficiently installed solar cells that do the job you need them to do.