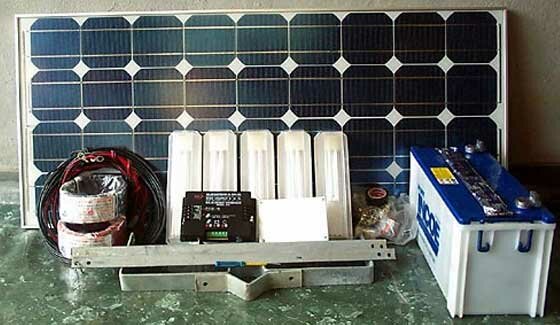
Home Solar Power Kit
You may think that DIY home solar installation is too hard for you.
Perhaps you think it’s too technical or too big of a job for a do-it-yourselfer. The truth is that a DIY solar kit installation is possible for almost anyone.
Besides, the long-term financial benefits and energy independence a photovoltaic system provides is more than worth the effort.
Why Switch to Solar Energy?
Homeowners have much to consider when evaluating the potential benefits of installing a solar system.
The biggest reason to adopt PV energy is the exceptional level of cost savings.
Once your system is up and running, you will save on energy costs throughout the life of the system. And you can expect your PV panels to function at or near full capacity for 30 years or more!
But the benefits don’t just stop at the savings. Adding a solar panel array also:
- Increases property values
- Creates energy independence
- Protects the environment
- Sets a good example for your friends and neighbors
So, are you ready to get started?
Where to Begin with DIY Solar
A DIY solar installation requires a bit of planning. Find out:
- Is there enough room on your roof or elsewhere on your property for an array?
- Where is the most convenient place for you to place the array?
- Does your roof or property have sun for most of the daylight hours?
- Are there any obstructions such as trees or buildings that would block the sun?
- Is your roof structurally sound? Can it handle the added weight of panels?
Once you’ve answered these questions and decided that solar energy will work for you, you’re ready to keep going. And don’t give up if you can’t unequivocally answer yes to every question. You can find any number of ways to work around shade or even a small roof.
Look at Your Electric Bills
Now, gather up your electric bills from the last 12 months to determine how much electricity you use during your highest months of usage.
Look for the kWh (kilowatt-hours) consumption numbers, and total them up for the year. Keep this number in mind so that you can refer back to it during the rest of your planning.
The size of the system you need will be determined by your highest monthly level of power use.
Select Your DIY Solar Kit Components
To build your own system you will need, at minimum:
- Solar panels
- A mounting system
- An inverter
It’s important to note that an off-grid system requires a battery backup. This adds a level of complexity to the DIY process that most experts don’t recommend you attempt, unless you have direct experience.
The DIY Solar Installation Process
Professional installation is a large portion of the cost of a solar panel system, so doing the work yourself saves you big bucks.
It is extremely important, however, that you bring in a licensed electrician for the electrical connections. This costs more than doing the wiring yourself, but it isn’t an option in most states, unless you’re an electrician.
When it’s time to mount the panels, you must first prepare the mounting and racking system. These systems, especially SnapNrack products, are plug-and-play systems and are very easy to assemple.
The panels themselves are quite easy to mount, once the racking is attached to the roof. You simply need to lay the panels in play, connect together as you go, and ratchet them into place.
Now, have the electrician wire in the panel and voila! You should be ready to go!
Be sure that you purchase your DIY solar kit from a reputable and established source. This is the only way to ensure that your components come with a full warranty.
Plus, a solar kit provider can be an invaluable resource for helping you design your system and for answering any questions you have throughout the DIY home solar installation process.
Jen Stott is a writer and blogger, and works as the Content Director at Be Locally SEO in Salt Lake City, Utah.
If you think solar is right for your home, now is the time to design your own solar panel system.