5 Essential Components to Build a Home Wind Generator


The residential wind energy industry is booming. The technology is slowly coming to age with better, more reliable machinery and a greater understanding of how and where to use wind energy for homes.

Due to rising energy cost and heightened concerns about our environment, many home owners are opting for renewable energy sources such as wind generator.

However, if you were to engage a professional contractor to build the wind generator, be prepared to invest up wards of $10,000. Some people do not have that kind of budget.

Alternative, many home owners are building their own residential wind power system via Do It Yourself (DIY) approach.

The following is a list of 5 essential components of a homemade wind energy system:

1) Generator.

The generator is one of the key components of the home wind turbine. The function of the generator is to take the kinetic energy from the spinning blades and converting it into Direct Current (DC).

The Direct Current can then be used to charge up a deep cycle battery. The power from the battery will then go to an inverter to change the DC to Alternate Current (AC). The power from the inverter can then be used to power our household electrical appliances.

2) Blades and hub.

The blades of a wind generator are another crucial element to the system. The function of the blades is to harness the potential energy of the wind and then transferring it into the hub.

The blades can be made from various types of material. The most common material for a homemade wind turbine is either PVC pipe or timber planks.

The best material to make the hub is aluminum due to its light weight.

3) Mounting.

The generator, hub and blades are all affixed on a mounting system. In order to make the blades face the direction of the wind, a piece of heavy aluminum sheet is attached to the back of the mount to act as a wind directional tail.

4) Tower.

The completed wind generator is to be placed high up on a tower. A minimum of 10 feet from the ground is recommended.

To make sure the town is sturdy, it has to be strung tight with steel cables anchored to 4 big wooden stakes on the ground.

5) Charge Controller.

The charge controller is where the cables from the turbine will be connected to. The main function of the charge controller to charge up a deep cycle battery. The controller will stop charging the battery when it is full. Overcharging will reduce the lifespan of the battery.

Another function of the charge controller is to prevent any backflow of current from the battery to the generator. Without the charge controller and when the blades are idle, the generator will slowly drain the power from the battery which took hours to charge.

Homemade Wind Generator For Under $100

Do you want to know how to make your own home wind generator for under $100? If you do, check out the Build a Wind Generator Plans manual from Les Oke.

Les Oke and his family have been living off the grid for more than 15 years. He will show you step-by-step how to building an inexpensive residential wind power system on his guide.
==> Click here to read more about Build a Wind Generator Plans now!

10 Easy Steps to Build a DIY Solar Panel Under $100


Can you build a Do It Yourself solar panels for less than $100? Yes it can be done but it will take some work. Remember, this is making the solar panel, not the whole residential solar power system. Realistically, you will need more capital for that.

Nonetheless, the solar module will take up a large part of the whole budget. More than 50 percent of the total cost actually. So, here are 10 easy steps how you go about constructing a solar panel for under $100.

1) Get hold of the Photovoltaic (PV) cells.

The PV cells are the key components of the solar panel. A typical solar module should be able to produce about 18 volts and 75 watts of power under the sun.

To find cheap solar cells, go to eBay and make a few bids. You will need to acquire 36 pieces of 3” x 6” cells.

2) Check the PV cells.

When you received the PV cells, the next step is to check its working condition. To do this, you will need to use a multi-meter.

Check the voltage and current produced by each individual cell. Check the cells under direct sunlight to get a good reading. You may need to use a testing block for this task.

3) Determine the panel dimension.

Now you have to decide the dimension of the solar panel. Basically, you need to figure out how to arrange the cells.

There are 2 popular options. You can opt for the 4 cells across x 9 cells down or 3 cells across x 12 cells down arrangement.

4) Building the frame.

Now that you have the dimension, you can start making the frame. The type of building material you should use to save cost is plywood and wooden strips.

5) Wire the PV cells together.

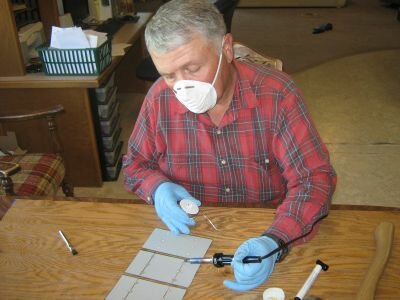
Bring out your soldering iron, solder and flux. It’s time to solder all the solar cells together.

All 36 PV cells have to be connected in series. Solder 9 cells together to make 1 roll. Now solder 3 more rolls of PV cells.

The electrodes from the negative side (bluish surface) should be soldered to the contact points at the back of the next solar cell (positive side).

6) Securing solar cells to the substrate.

Take out the silicone and put a dab on the back of the solar cells. Stick it on the substrate (plywood).

7) Complete wiring of the cells.

Now all the cells have to be connected to the positive and negative homerun wires. Next, secure the substrate in the solar panel frame.

8) Attach clear cover.

Use a piece clear Plexiglas as the cover for the solar panel. Make sure the Plexiglas is UV proof. You don’t want it to turn yellow after prolong exposure to the sun.

9) Seal with silicone caulk.

Use a liquid silicone to seal all the joints. You want to prevent any moisture from rain or snow from getting into the interior of the solar panel.

Trapped moisture will create fog which will reduce the efficiency of the PV cells.

10) Panel testing.

Finally, test the solar panel under the sun. Again, use the multi-meter. The voltage produced from the combined solar cells should be about 18 volt. Current readings should be around 2.5 – 3 amps.

If you are looking for instructions on how to make a Do It Yourself (DIY) solar panel for under $100, check out the Power 4 Home program.

It has a series of High Definition (HD) instructional videos that will show you step by step the procedures to construct your own solar module. For more information, read the Power 4 Home reviews on this blog.

==> Click here to visit Power 4 Home now!

Homemade Solar System – Determining the Perfect Solar Panel Dimension


In my last couple of blog posts, I have been writing about homemade solar system. As it turns out, this is a good idea because it will reduce your home green energy system costs quite substantially.

A complete residential solar power system can be quite expensive. The bulk of the cost is in the solar panel. About 60 percent of the budget will be spent on the solar cells.

Now you know why making your own solar panel is such a big deal. It’ll save you tons of money.

The Right Solar Panel Dimension

When we are making the solar module, how big should it be? For starter, you want to make a solar panel which can produce around 18 volts and have a power output of about 75 watts.

That said solar panel will be suitable to charge a typical 12V deep cycle a battery. To make the module, you will need 36 Photovoltaic (PV) cells.

Now, the question is how do you arrange the cells in the panel? There are 2 options you can choose.

1) 4 cells across x 9 cells down

2) 3 cells across x 12 cells down

Here’s how you get the right dimension for your DIY solar panel.

A typical solar cell is 3” x 6”. If you are using the 4 cells across arrangement, you will need at least 24” of width on the panel (6” x 4 = 24”).

For good measure, you want to have at least ¼” in between the rows, so add ¾” to the width (1/4” x 3 = ¾”).

Then add an inch on the right and left sides of the panel and you have 24 3/4 “. Lets round up to 25” for easy calculation.

Now, do the same math to get the height of the solar panel. Remember, 9 PV cells down.

Therefore 9 x 3” each, plus 8 spaces in between the cells x ¼” plus 3” to allow more spaces along the tops and bottoms of the panel for wiring the individual strings of cells together. Punch in the calculator and you will get 32”.

The right dimension for a 4 cells across x 9 cells down arrangement solar panel is 25” x 32”.

This dimension is necessary for you to make the substrate that you will be using to attach the PV cells to with liquid silicon.

Building DIY Solar Panel Under $100

Is it possible to make a solar panel for under $100? Yes it is possible if you were to follow some specific instructions. To find out how to make an inexpensive solar module, check out the Power 4 Home guide.

The program will show you step-by-step with High Definition (HD) instructional videos on how to make a solar panel with a budget of only $100. For more information, read the Power 4 Home review on this blog.

==> Click here to visit Power 4 Home now!


Related web pages:
1) Earth 4 Energy Scam – Is The Earth4Energy E-book A Fraud?