<

A solar panel is a set of interconnected construction of solar cells, also called Photovoltaic (PV) cells. The solar panel can be utilized as a constituent of a larger photovoltaic system to generate and distribute electricity for commercial and residential applications.
This post is a brief introduction to Do It Yourself (DIY) solar panel construction, which involves soldering of solar cells together. Although most people are already aware, it is better to know that solar cells are, basically, two types: “tabbed” and “un-tabbed”.
Even though tabbed cells are somewhat costlier, overall, it will work out much cheaper, if one intends to construct more than one solar panel. Besides use of tabbed cells will save a lot of time, the number of broken cells will be much less and because of this, there will not be any scope for irritations.
Solar cells are very delicate and the chances of breakages would be higher if they are handled more frequently or also not handled carefully. As solar cells are very brittle, soldering calls for careful handling and un-tabbed solar cells not only require soldering across a cell but also involves twice the amount of work than that of tabbed cells and the breakage of cells is likely to be much more in respect of un-tabbed cells.
Tabbed solar cells are provided with the metal connector strips connected to the front portion of “sunny side face” of the solar cells. This strip has a free end sufficiently long to position it across the subsequent cell.
These tabbed cell strips will link the front of one cell to the contact point on the subsequent cell and the process is repeated till all the solar cells are interconnected. While the front side of most of the solar cells is negative, the back portion is positive thereby, enabling the electric current to pass through between the cells in the solar panel. As mentioned earlier, the tabbed solar cells are preferred because considerable effort has to be put in to solder un-tabbed solar cells.
The first step in the construction of a solar panel is essentially to solder a new metal strip to the front of each cell before even thinking of interconnecting the solar cells. As the solar cells are delicate, it involves a lot of time to do the difficult job of soldering each cell, especially if these are un-tabbed cells. It is, therefore, advisable to purchase only tabbed solar cells for paneling.
Another important aspect in the construction of a solar panel is to choose a superior quality 65 to 75 watt regulating type soldering iron, which should be set to a temperature of around 700°F. The temperature control is very essential.
If the soldering iron is very cold, solder will not function properly and if it is too hot, the cells are likely to get damaged. However, if someone has purchased un-tabbed cells, one should, as a first step solder a tabbing strip to the “sunny-face” of each of the cells.
There are two methods of doing it; both are, of course, very tricky and difficult. One can either solder the strip directly to the cell using flux, pre-solder or “tin” each strip before soldering it to the cell. The main reason for adopting one of the two methods is to ensure a “solid connection” to the solar cell or otherwise, electric current will not pass through the cells.
Solar tabbing ribbon, normally, comprises 10 to 15 micrometers of solder alloy with 60% tin and 40% lead, known as SN60, coated on a copper strip. As the alloy contains lead, pre-soldering the tabbing strip is a cumbersome process and some people will, therefore, avoid this step.
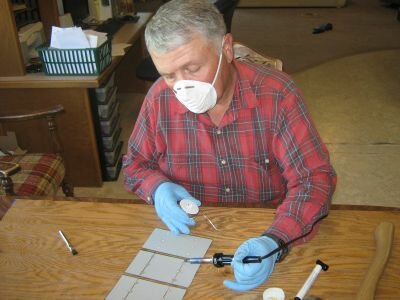
Flux should be applied either way to the large glittery strips (the “bus bars”) on the front of “sunny face” of the solar cell. The next step is to place the tabbing strip along the fluxed bus bar and with a flat soldering iron, move gradually down the strip. This is a very delicate job. If it is not done properly, the tab strip will come off.
If it is done carefully; the tabbing strip will firmly connect to the bus bar. For this work, the help of an additional hand would be highly desirable. Sometimes, it may be better to practice on a broken cell using an extra strip in order to get an idea of the work involved in soldering.
As there are normally two of these strips on each solar cell, soldering is always a tricky and difficult job. From this, one can easily understand why it is highly desirable to purchase tabbed cells.
DIY Photovoltaic Panel Construction Guide

Do you want to learn how to build your own DIY solar panel at home with a budget of less than $200? If you do, check out the Green DIY Energy program. The program comes with step with step instruction and High Definition (HD) videos on making your own PV panels from scratch. Click on the link below to visit the web site right now.