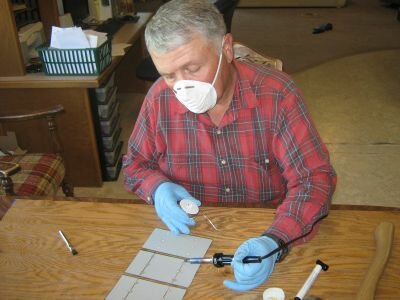
Can you build a Do It Yourself solar panels for less than $100? Yes it can be done but it will take some work. Remember, this is making the solar panel, not the whole residential solar power system. Realistically, you will need more capital for that.
Nonetheless, the solar module will take up a large part of the whole budget. More than 50 percent of the total cost actually. So, here are 10 easy steps how you go about constructing a solar panel for under $100.
1) Get hold of the Photovoltaic (PV) cells.
The PV cells are the key components of the solar panel. A typical solar module should be able to produce about 18 volts and 75 watts of power under the sun.
To find cheap solar cells, go to eBay and make a few bids. You will need to acquire 36 pieces of 3” x 6” cells.
2) Check the PV cells.
When you received the PV cells, the next step is to check its working condition. To do this, you will need to use a multi-meter.
Check the voltage and current produced by each individual cell. Check the cells under direct sunlight to get a good reading. You may need to use a testing block for this task.
3) Determine the panel dimension.
Now you have to decide the dimension of the solar panel. Basically, you need to figure out how to arrange the cells.
There are 2 popular options. You can opt for the 4 cells across x 9 cells down or 3 cells across x 12 cells down arrangement.
4) Building the frame.
Now that you have the dimension, you can start making the frame. The type of building material you should use to save cost is plywood and wooden strips.
5) Wire the PV cells together.
Bring out your soldering iron, solder and flux. It’s time to solder all the solar cells together.
All 36 PV cells have to be connected in series. Solder 9 cells together to make 1 roll. Now solder 3 more rolls of PV cells.
The electrodes from the negative side (bluish surface) should be soldered to the contact points at the back of the next solar cell (positive side).
6) Securing solar cells to the substrate.
Take out the silicone and put a dab on the back of the solar cells. Stick it on the substrate (plywood).
7) Complete wiring of the cells.
Now all the cells have to be connected to the positive and negative homerun wires. Next, secure the substrate in the solar panel frame.
8) Attach clear cover.
Use a piece clear Plexiglas as the cover for the solar panel. Make sure the Plexiglas is UV proof. You don’t want it to turn yellow after prolong exposure to the sun.
9) Seal with silicone caulk.
Use a liquid silicone to seal all the joints. You want to prevent any moisture from rain or snow from getting into the interior of the solar panel.
Trapped moisture will create fog which will reduce the efficiency of the PV cells.
10) Panel testing.
Finally, test the solar panel under the sun. Again, use the multi-meter. The voltage produced from the combined solar cells should be about 18 volt. Current readings should be around 2.5 – 3 amps.
If you are looking for instructions on how to make a Do It Yourself (DIY) solar panel for under $100, check out the Power 4 Home program.
It has a series of High Definition (HD) instructional videos that will show you step by step the procedures to construct your own solar module. For more information, read the Power 4 Home reviews on this blog.